The northern lights season is on and has been extremely powerful up in the night sky due to solar storms! Take a moment to read about the auroral zone and why is North Lapland the best place to see northern lights and how to capture this phenomena with your camera or smartphone.
There is still no snow as the nights get darker and northern lights reflect from the surface of lakes and ponds. It is truly amazing how they are so strong that they color the surroundings in green hue. While northern lights are really well known during winter nights, you should definitely experience them during autumn as well!
Join the northern light tours to acquire more knowledge and insight where and when you should be to see the mystical dance up in the night sky.
What causes this phenomena to appear in the northern sky and why is the North Lapland best place to see them?
Solar storms are occurring all the time and they tend to be stronger and weaker but they happen continuously. A solar flare can be so strong that when the eruption happens towards the Earth, it can cause problems to radio communication for example.
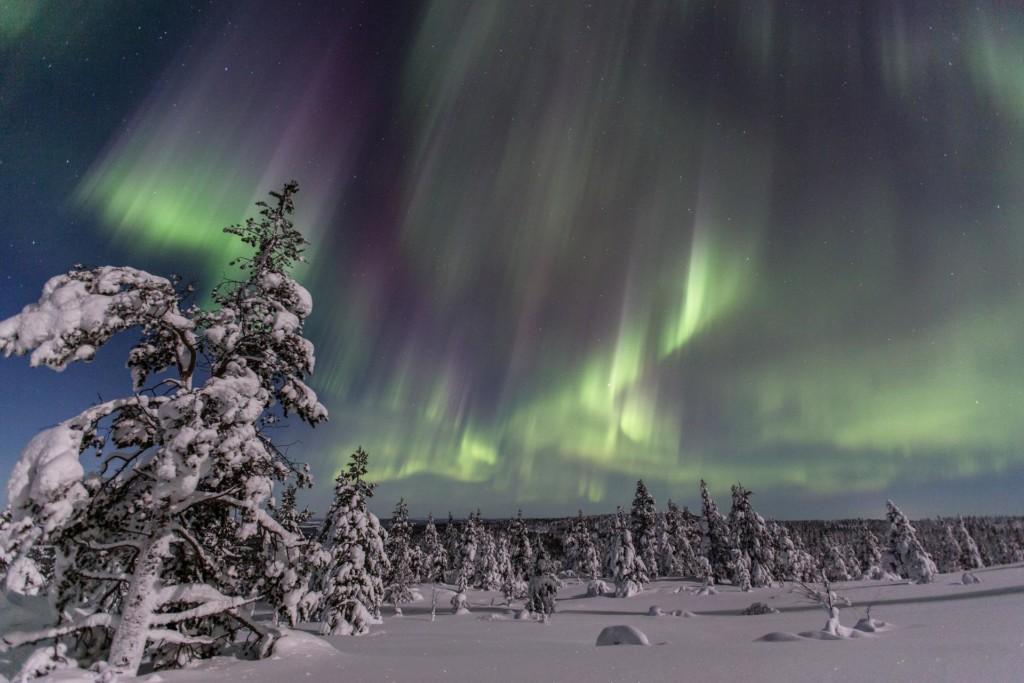
But here in the northernmost Lapland the solar winds appear as strong bright northern lights. Northern lights are the result of disturbances in the magnetosphere caused by solar wind. We are located in the auroral zone and that’s why about every other night the northern lights are visible if the sky is clear between September and April. It might take a few days for the solar winds to reach Earth after solar flares occur on the surface of the sun. The northern lights tend to appear mostly close to geomagnetic poles but sometimes the auroral field expands so that northern lights are visible in more southern latitudes.
Taking on the challenge of northern lights photography
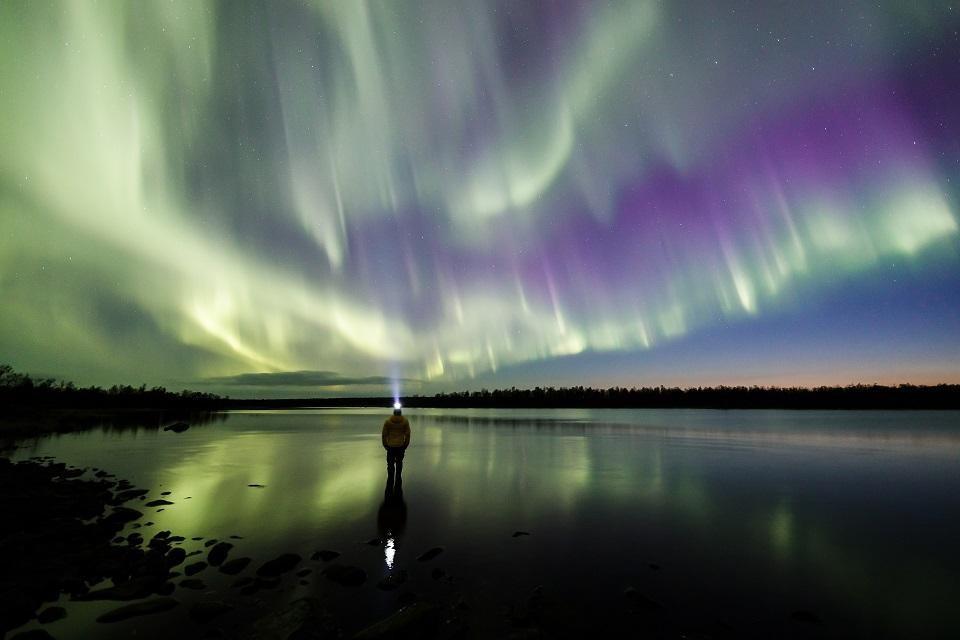
Seeing northern lights is a dream for nearly everyone who visits our region Inari-Saariselkä. Taking a picture of them is a challenge but fear not it is possible and we encourage you to go and try. Taking a smartphone for example, the technical development has gone forward so much in resent times that you are able to capture a photo of the auroras with your smartphone!
If you are carrying a camera with you, you might be familiar with taking pictures of nature and sights during the day but maybe you hope to have clear instructions for nighttime photography and especially taking a photo of northern lights dancing up in the night sky?
Taking a photo of the northern lights does have some basic guidelines you can start with but as the amount of light and movement they have so should your camera settings change.
One thing you should get familiar with is your smartphone cameras “pro mode” or such where you can access and settings yourself. Nightscape or nighttime modes are relevantly good but still it’s recommended to put the effort in and use the so to say “manual mode”. So get your phone ready and gaze towards the night sky.
With your camera you should also hop off the auto mode which is a comfort zone and goes a long way, but in this case it can do more harm than good. You should choose the aperture priority or manual mode for northern lights photography.
And remember that nobody is a pro to start with so be patient and try out different settings to find the best ones, but please don’t freeze your fingers in the frosty nighttime air and have a back up battery or two with you!
On to the camera settings
First of all if you have a tripod in use, brilliant! If not then don’t worry success can be achieved nevertheless.
Camera display has some sort of lighting always so it can be a challenge to focus your camera to the night sky. You should start with tuning your focus to infinity. If you are lucky and not alone on your gazing trip then you can use your company as a focus point. Guide them so that they are in your frame, not too close and if their headlamp is on, try to focus on that. You can check your infinity focus already during the day but as we know, usually northern lights and seeking them happens really spontaneously too.
Have you ever heard of the triangle of exposure?
The triangle includes the following settings:
- Aperture
- ISO
- Shutter speed
Now that we have our focus set let’s decide the correct aperture. Aperture is the opening in your camera lens where light passes to enter your camera. The Aperture setting is expressed as F-stops. You can see this on your camera display as something like f/2.8. This number tells you how large is the opening of your lens. The funny thing is which often messes with your mind that the lower the number, the bigger the opening actually is. For northern lights photography you should choose the smallest number that is the biggest opening. Usually between 2.8-4.
Alright next up is defining your ISO. This means the light sensitivity setting for the light sensor that your camera has. As you may notice not all the lights are as bright. You should start with ISO setting of 800 for bright northern lights as larger number easily increases noise aka graining. If the lights are dim you can go up to ISO setting of 3200.
Next up is shutter speed. Here you define the time that your shutter uses to stay open and capture all the light. For shutter speed setting that keeps the shutter open for multiple seconds, you should use a tripod or a steady surface. No matter if you have a phone or a digital camera. With a smartphone without a tripod I recommend using timer to get sharp pictures as every single movement you make holding it affects the picture. That is why pictures often appear blurry. Try setting your shutter speed at 5 seconds and extend it if necessary. Keep in mind that every movement effects the photo. So does the movement of northern lights. They may move really fast so a shutter speed of 30 seconds has time to get affected severely from the movement.
Gathering it all together
- Aperture as low you can go, usually 2.8 or 4
- Start with ISO800 but you can go all the way to 3200
- Shutter speed: Start with 5 seconds and go up to 30 seconds
Editing your pictures to reveal what they already posses within
Why does it seem like you have followed all the necessary settings to capture your photo but it’s still not quite there?
The simple, yet most meaningful reason is editing. Yes it’s true editing makes the pictures so phenomenal. With editing you can enhance and bring out everything your picture already includes. You don’t have to and you shouldn’t go overboard with it but a subtle edit amps up your pictures. Editing is super easy to start and there are many free tools you can use for it. Also a reason to do an edit is to show the picture as the view was in our eyes as camera can never replace the human eyesight.
After your holiday here, enjoy your memories and pictures you took on your northern light tours, taking a walk near village centre, on a safari with snowmobile or reindeer. Find happenings in picture that you didn’t see while capturing the moments.